I have five younger brothers. Anyone who has a lot of brothers (or a lot of cousins, or a lot of sons) knows that they sometimes enjoy beating each other up. In a good way.
Mark and my brothers like to stage sword fights together, but there’s a problem with the weaponry. We’ve bought several wooden practice swords over the years, but they’re small flimsy things that snap and break too easily. On the other hand, real swords are too heavy, too sharp, and in all aspects too dangerous to really use in sword fights.
So for my brother’s birthday Mark set out to design and create the ideal play swords: something sturdy enough not to get broken in combat play but still soft enough not to do any real damage in a heavy blow.
The swords that Mark engineered fit the bill perfectly. Because of the PVC core, they are sturdy and unbreakable and feel heavy like real swords. But because of the soft foam all around the “blades,” you can deliver really hard hits without hurting anyone. Perfect for a band of backyard scalawags.
To make a batch of swords for your crew, all you’ll are the following materials:
- A permanent marker.
- Scissors.
- Duct tape. With two full rolls of duct tape you can make four swords; you may want a few different colors (we used black, standard silver/gray, and red).
- A camping pad. Nothing fancy, just a cheap foam one–you can buy them at Walmart or just about anywhere for under $15. One camping pad is enough to make five swords.
- PVC pipe, cut to the lengths you want the swords to be. We used quarter-inch PVC and cut the swords to lengths between three and five feet long.
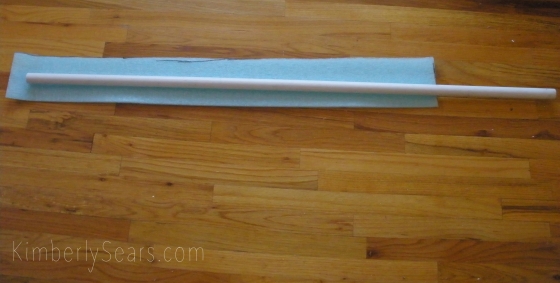
The first step (below) is to roll your PVC into the camping pad and mark where the edge touches. This mark lets you know how wide to cut your piece of foam. Also mark where you want the blade of your sword to end and the hilt to begin (below, bottom). This mark lets you know how long to cut your piece of foam, since the hilt of the sword will not have foam wrapped around it.
Next cut out your piece of foam from the camping pad, following the marks you just made. Be sure to do this in your pajamas and then post a photo on the internet.
Now you have your foam piece cut perfectly to fit the size of the PVC pipe. (Except the hilt; it remains uncovered because if it were wrapped in foam it would be too thick to grip.)
Now you get to start making the blade of your sword! Roll the foam around the PVC and secure it with a few pieces of duct tape. Make sure to roll, wrap, and tape really tightly because otherwise the foam will slide around on your PVC. And a sliding-around-foam-sword would not be a very intimidating way to do battle.
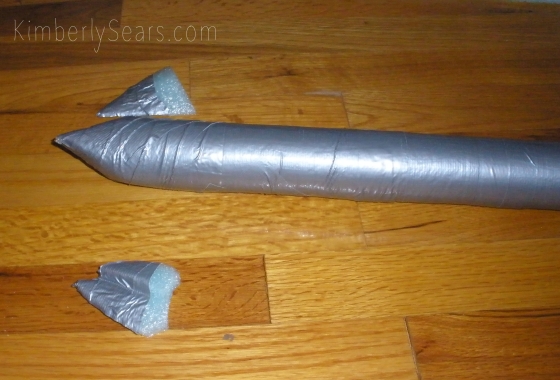
Keep wrapping tape as tightly as you can (below) until the blade is all covered (below, bottom).
Getting a pointy sword tip is easy–you just cut the ends of your foam and wrap more duct tape.
Now you’ll have a fine-looking blade! But alas, no hilt. This is where a second color of duct tape plays a part. You wrap it around the bare PVC to make a hilt. We used black (below).
And now the fun part! (Not that ripping piece after piece of silver duct tape for the blade ISN’T fun.) Time to add finishing touches!
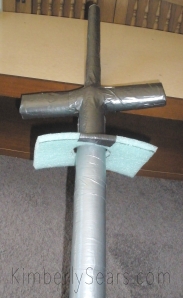
You can use colored duct tape to add a pommel (above). You can use more foam and duct tape to engineer a cross guard, or even two (below). Let your imagination run wild. Watch Lord of the Rings to inspire you (and to keep you entertained while you rip duct tape for two hours.)
Behold the finished products!
Below, a hand and a half sword
A Scottish broadsword
A Norman sword
A Scottish claymore, or two-handed longsword
I worried that there might be some arguing about who claimed which sword, but that was not the case. Each warrior gravitated to a different sword (thank goodness!). No arguments.
The battles, however, are just beginning!
Avast ye! There are games afoot!
…
And now I’m off on a summer road trip to go enjoy Fourth of July fireworks agains the backdrop of the Tetons! Happy Independence Day!
P.S. I’ve decided that for the rest of the summer I’ll be posting once a week, on Thursdays. (Why Thursday? Because I was born on a Thursday, and married on a Thursday…it’s my favorite day of the week!)


